MS WORD TIPS AND TRICKS
MS WORD TIPS AND TRICKS
MS WORD TIPS 1 : VERTICAL SELECTION
Sometimes we need more attractive look in our document. So, here in this MS Word Tips and Tricks tutorial I am explain how to select text vertically and use formatting on it like Text, color formatting etc. To select the vertically press alt + drag vertically with mouse which is shown below in Fig 1.
कभी-कभी हमें अपने दस्तावेज़ में अधिक आकर्षक रूप की आवश्यकता होती है। तो, यहाँ इस ट्यूटोरियल में बताया गया है कि कैसे टेक्स्ट को वर्टिकली सेलेक्ट करना है और उस पर फॉर्मेटिंग का उपयोग करना है जैसे टेक्स्ट फॉर्मेटिंग, कलर फॉर्मेटिंग आदि। वर्टिकली सेलेक्ट करने के लिए press alt + माउस ड्रैग करके वर्टिकली सेलेक्ट कर सकते हैं। जो नीचे चित्र 1 में दिखाया गया है।
Fig 1.
After selecting the text you can apply any formatting in it, here I use color formatting in this paragraph and do the same steps if needed which is shown below in Fig 2.
पाठ का चयन करने के बाद आप इसमें किसी भी स्वरूपण को लागू कर सकते हैं, यहां मैं इस पैराग्राफ में रंग प्रारूपण का उपयोग करता हूं जो नीचे चित्र 2 में दिखाया गया है।
Fig 2.
MS WORD TIPS 2 : Screenshot
In Ms Word 2010, screenshot is in Insert tab, here screenshot is used for - if you want another file contents in your document that you can use it. Here, I opened an excel data file and takes screenshot which is shown below in Fig 3.
Ms Word 2010 में, स्क्रीनशॉट इन्सर्ट टैब में है, यहाँ स्क्रीनशॉट का उपयोग इस तरहा से किया जाता है - यदि आप अपने दस्तावेज़ में कोई अन्य फ़ाइल सामग्री चाहते हैं, जिसका आप उपयोग करना चाहते हैं। यहां, मैंने एक एक्सेल डेटा फ़ाइल खोली और स्क्रीनशॉट लिया जो कि चित्र 3 में नीचे दिखाया गया है।
Fig 3.
MS WORD TIPS 3 : Screen Clipping
You
can see the above image it takes whole window screenshot, but I need only data
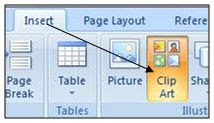
than what can we do? Here is the solution, by click on screen clipping which is
in Insert tab and select the data part it automatically takes screenshot and
placed in your document which is shown below in Fig 4.
आप उपरोक्त छवि को पूरी विंडो स्क्रीनशॉट में देख सकते हैं, लेकिन मुझे केवल डेटा की आवश्यकता है जो हम कर सकते हैं? यहाँ इसका समाधान है, स्क्रीन क्लिपिंग पर क्लिक करके जो इन्सर्ट टैब में है और डेटा भाग का चयन (select) करना हैं, जो स्वतः ही स्क्रीनशॉट ले लेता है और आपके दस्तावेज़ में रख दिया जाता है जिसे नीचे चित्र 4 में दिखाया गया है।
Fig 4.
Screenshot by using keyboard
Those
who have not using ms word 2010 than they are take screenshot by using
keyboard. Open a document or file to take screenshot and now press
"PrtScr" on keyboard to take screenshot which is shown below in Fig
5.
जिन लोगों ने एमएस वर्ड 2010 का उपयोग नहीं किया है, वे कीबोर्ड का उपयोग करके स्क्रीनशॉट ले सकते हैं। स्क्रीनशॉट लेने के लिए एक दस्तावेज़ या फ़ाइल खोलें और अब स्क्रीनशॉट लेने के लिए कीबोर्ड पर "PrtScr" दबाएं जो नीचे चित्र 5 में दिखाया गया है।
Fig 5.
Screenshot by using Snipping Tool
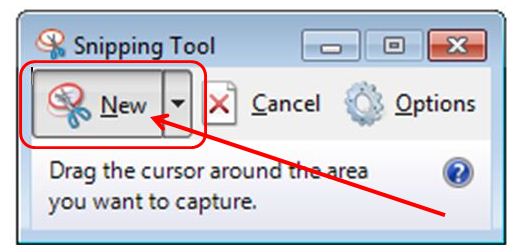
Similarly open a document files than click on Start button ⇒ Accessories ⇒ Snipping Tool which is shown below in Fig 6, Fig 7
इसी तरह एक डॉक्यूमेंट फाइल खोलें ओर स्टार्ट बटन पर क्लिक करे ⇒ एक्सेसरीज ⇒ स्निपिंग टूल जो नीचे चित्र 6, ओर 7 में दिखाया गया है
Fig 6.
Fig 7
Drag over the screen to take screenshot and customize it if you want which is shown below in Fig 8.
स्क्रीनशॉट लेने के लिए स्क्रीन पर mouse से drag करे जो चित्र 8 में नीचे दिखाया गया है।
Fig 8.


Comments
Post a Comment
Please do not enter any spam link into comment box.